In this tutorial, we will show you how to generate PDF reports from data stored in a SashiDo app’s database and the PDFKit library. We’ll go through the database setup, the prompt we used in ChatGPT, the code snippet ChatGPT wrote for us, and what are the next steps. Let’s get started!
You can watch our short video tutorial and if you’d like a more detailed explanation, continue reading.
Set Up Your Database
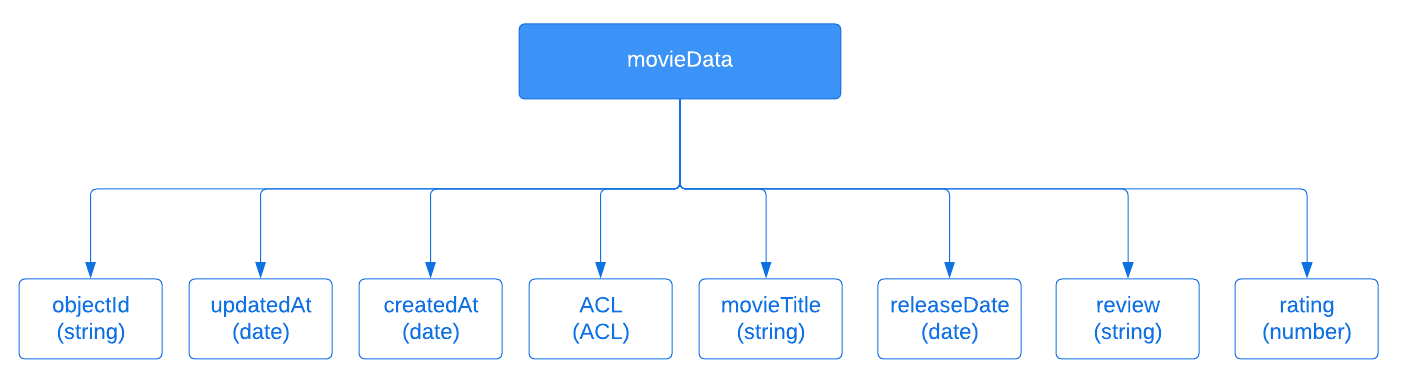
Diagram of the “movieData” class structure
For the purpose of this tutorial, we’ll need to create a new class called “movieData” in your database. You can do that from your app’s Dashboard > Core > Browser > Create a class.
Once you have your class, you can add the columns from the Dashboard by clicking on Add a new column and afterwards adding the data row by row.
You can also add the data using our REST API console that you can find in Core > API Console. From there, using the batch endpoint, you can add multiple rows of data. There’s also no need to create the columns beforehand. MongoDB automatically creates them when a column is missing.
The Prompt
When it comes to using ChatGPT for coding tasks, providing clear and concise instructions is essential for effective communication. By following the 4 guidelines below, we optimized our interactions with ChatGPT and improved the quality of the assistance the tool provided.
1. Clearly Define Your Objective
Before engaging with ChatGPT, it is crucial to have a clear understanding of your task. Take the time to define your objective and outline the specific problem or code-related challenge you need assistance with. By articulating your requirements, you can provide precise instructions to ChatGPT, increasing the likelihood of receiving relevant and helpful responses.
2. Be Direct and Concise
When formulating your prompts, it is important to get straight to the point. Avoid including unnecessary information or context that is not directly relevant to the task. By keeping your prompts concise and focused, you provide ChatGPT with a clear direction, reducing the chances of confusion.
3. Break Down Tasks into Manageable Steps
While ChatGPT is a powerful tool, it is not optimized for generating code for complex and large-scale projects. To make the most of its capabilities, it is advisable to break down your coding tasks into smaller, manageable steps. By dividing your problem into bite-size pieces, you can effectively utilize ChatGPT's assistance for specific aspects of your coding challenge.
4. Provide Sufficient Context
To ensure accurate and relevant responses from ChatGPT, you need to provide sufficient context in your prompts. Explain the problem statement, any relevant input/output examples, and any constraints or requirements that the solution should adhere to.
Here is the prompt we used for the purposes of this tutorial. It’s quite short and follows the 4 guidelines above.
I have a SashiDo app that uses Parse Server Version 3.1.3. In my database, I have a class named "movieData". It has the following columns: movieTitle, releaseDate, review, rating.
Write code that fetches the data from movieData and generates a pdf file with it.
Write the code in such a matter so that I won't need to edit it.
Connect Your Account to GitHub
Before we get to the code, you need to set up our development environment. With every SashiDo app, you get a free private GitHub repo where you have full access to your business logic, a.k.a your Cloud Code. So, to set up a dev environment, you’ll first need to link your GitHub and SashiDo accounts. If you’ve already done this, you can skip this step. For those who haven’t, you can connect your GitHub account to SashiDo from your app’s Dashboard > Core > Cloud Code > Start your Cloud Code.

If you aren't familiar with Cloud Code, we recommend watching our YouTube video tutorial on the topic, as well as going through Parse’s Cloud Code documentation.
Set Up a Local Development Environment
Once you’ve connected your GitHub and SashiDo accounts, you just need to head over to your private GitHub repo from your app’s Dashboard > Core > Cloud Code > Manage on GitHub.
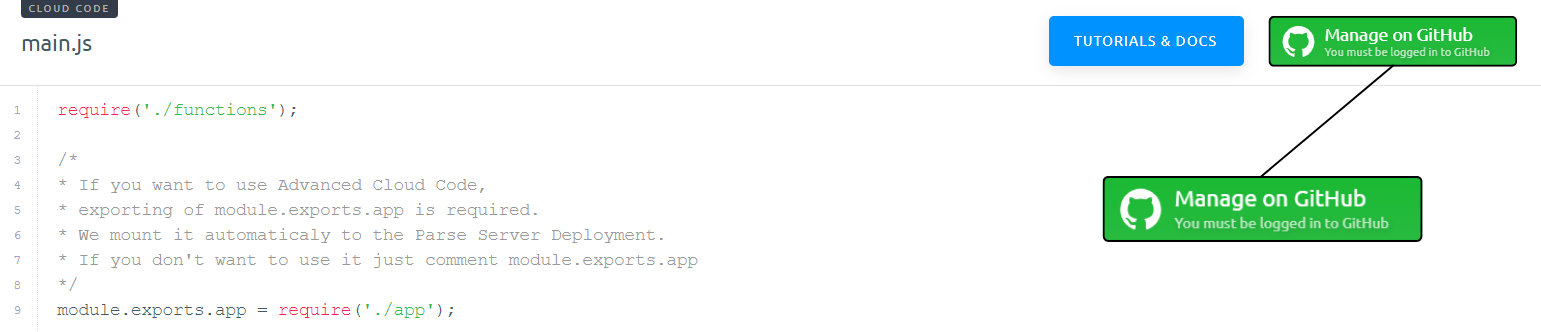
There you will find the README.md with instructions. We’ve also prepared a very detailed tutorial about creating a local development environment from scratch. We recommend checking it out, as well.
Results and Testing
Now that we’ve set up our local development environment, let’s see the code ChatGPT wrote for us.
Now that we’ve set up our local development environment, let’s see the code ChatGPT wrote for us.
const Parse = require('parse/node');
const PDFDocument = require('pdfkit');
const fs = require('fs');

// Initialize Parse with your SashiDo app credentials
Parse.initialize('YOUR_APPLICATION_ID', 'YOUR_JAVASCRIPT_KEY');
Parse.serverURL = 'https://YOUR_PARSE_SERVER_URL/parse';

// Create a new PDF document
const doc = new PDFDocument();

// Fetch data from the "movieData" class
const MovieData = Parse.Object.extend('movieData');
const query = new Parse.Query(MovieData);
query.limit(1000); // Set a limit to the number of results to fetch

query.find()
  .then((results) => {
    // Loop through the fetched movieData objects
    results.forEach((movie) => {
      const movieTitle = movie.get('movieTitle');
      const releaseDate = movie.get('releaseDate');
      const review = movie.get('review');
      const rating = movie.get('rating');

      // Write the movie data to the PDF document
      doc.text(`Title: ${movieTitle}`);
      doc.text(`Release Date: ${releaseDate}`);
      doc.text(`Review: ${review}`);
      doc.text(`Rating: ${rating}`);
      doc.moveDown(); // Move down to the next line
    });

    // Save the PDF document to a file
    doc.pipe(fs.createWriteStream('movieData.pdf'));
    doc.end();

    console.log('PDF file generated successfully!');
  })
  .catch((error) => {
    console.error('Error fetching movieData:', error);
  });
In summary, the code snippet fetches the movieData objects from the "movieData" class and iterates through them. It extracts the relevant data, such as movie title, release date, review, and rating, and writes them to a PDF document using PDFKit. Finally, it saves the generated PDF file in the current directory.
You can insert this code into the functions.js file or into a separate one. Once you’ve done this, you just have to do two things:
- Install the NPM modules – pdfkit and fs. I used the following command to install both: npm i pdfkit fs
- Initialize your Parse Server – you can find your credentials in your app’s Dashboard > App Settings > Security & Keys. From there you’ll just need your Application ID, JavaScript Key, and your API URL Address.

After you’re done with these steps, you can run the code and see that your pdf file was created in your local directory.
You shouldn’t stop here and deploy your code to production. We always recommend testing code before deploying it. This is a crucial step for ensuring reliable software performance, minimizing the risk of glitches, and providing a positive user experience.
We haven’t included specific tests in this tutorial because every app is different and what works for one, might not work for another. Take your time to thoroughly test your code to ensure it doesn’t create any problems with your existing app.
Next Steps
After you’re done testing and you’re satisfied with the results, you just need to commit the changes to your GitHub repo. I did this by running the following command: git commit -m "write to pdf functionality" and afterwards pushing the changes to the master branch with git push. This will cause your app to build and deploy automatically.

After a few minutes, your app will be running with the latest changes you pushed.
Conclusion
In this tutorial, we explored how to leverage ChatGPT’s code-writing capabilities to quickly add new features to your apps and save time and effort. The code snippet in this tutorial is fairly simple but you can pull off more challenging use cases. The trick is in giving ChatGPT a simple prompt and asking short follow-up questions.
We’d be happy to hear how you’ve leveraged ChatGPT in your professional life and what positive effects it had on you.
Happy coding!